The "Before" I tried to embrace the pink tile and we had a lovely Pink and grey window treatment made, however, due to the black tarp on the ceiling and the pink tiles all being cracked, it was time to make a change.
Time for things to go. The demolition begins.
The sink console...buh-bye!
The wall hung toilet that used 5 million gallons of water per flush - buh bye!
Plaster walls - buh-bye!
Here you can see the lovely pink tile. The toilet and sink vanity have already been removed.

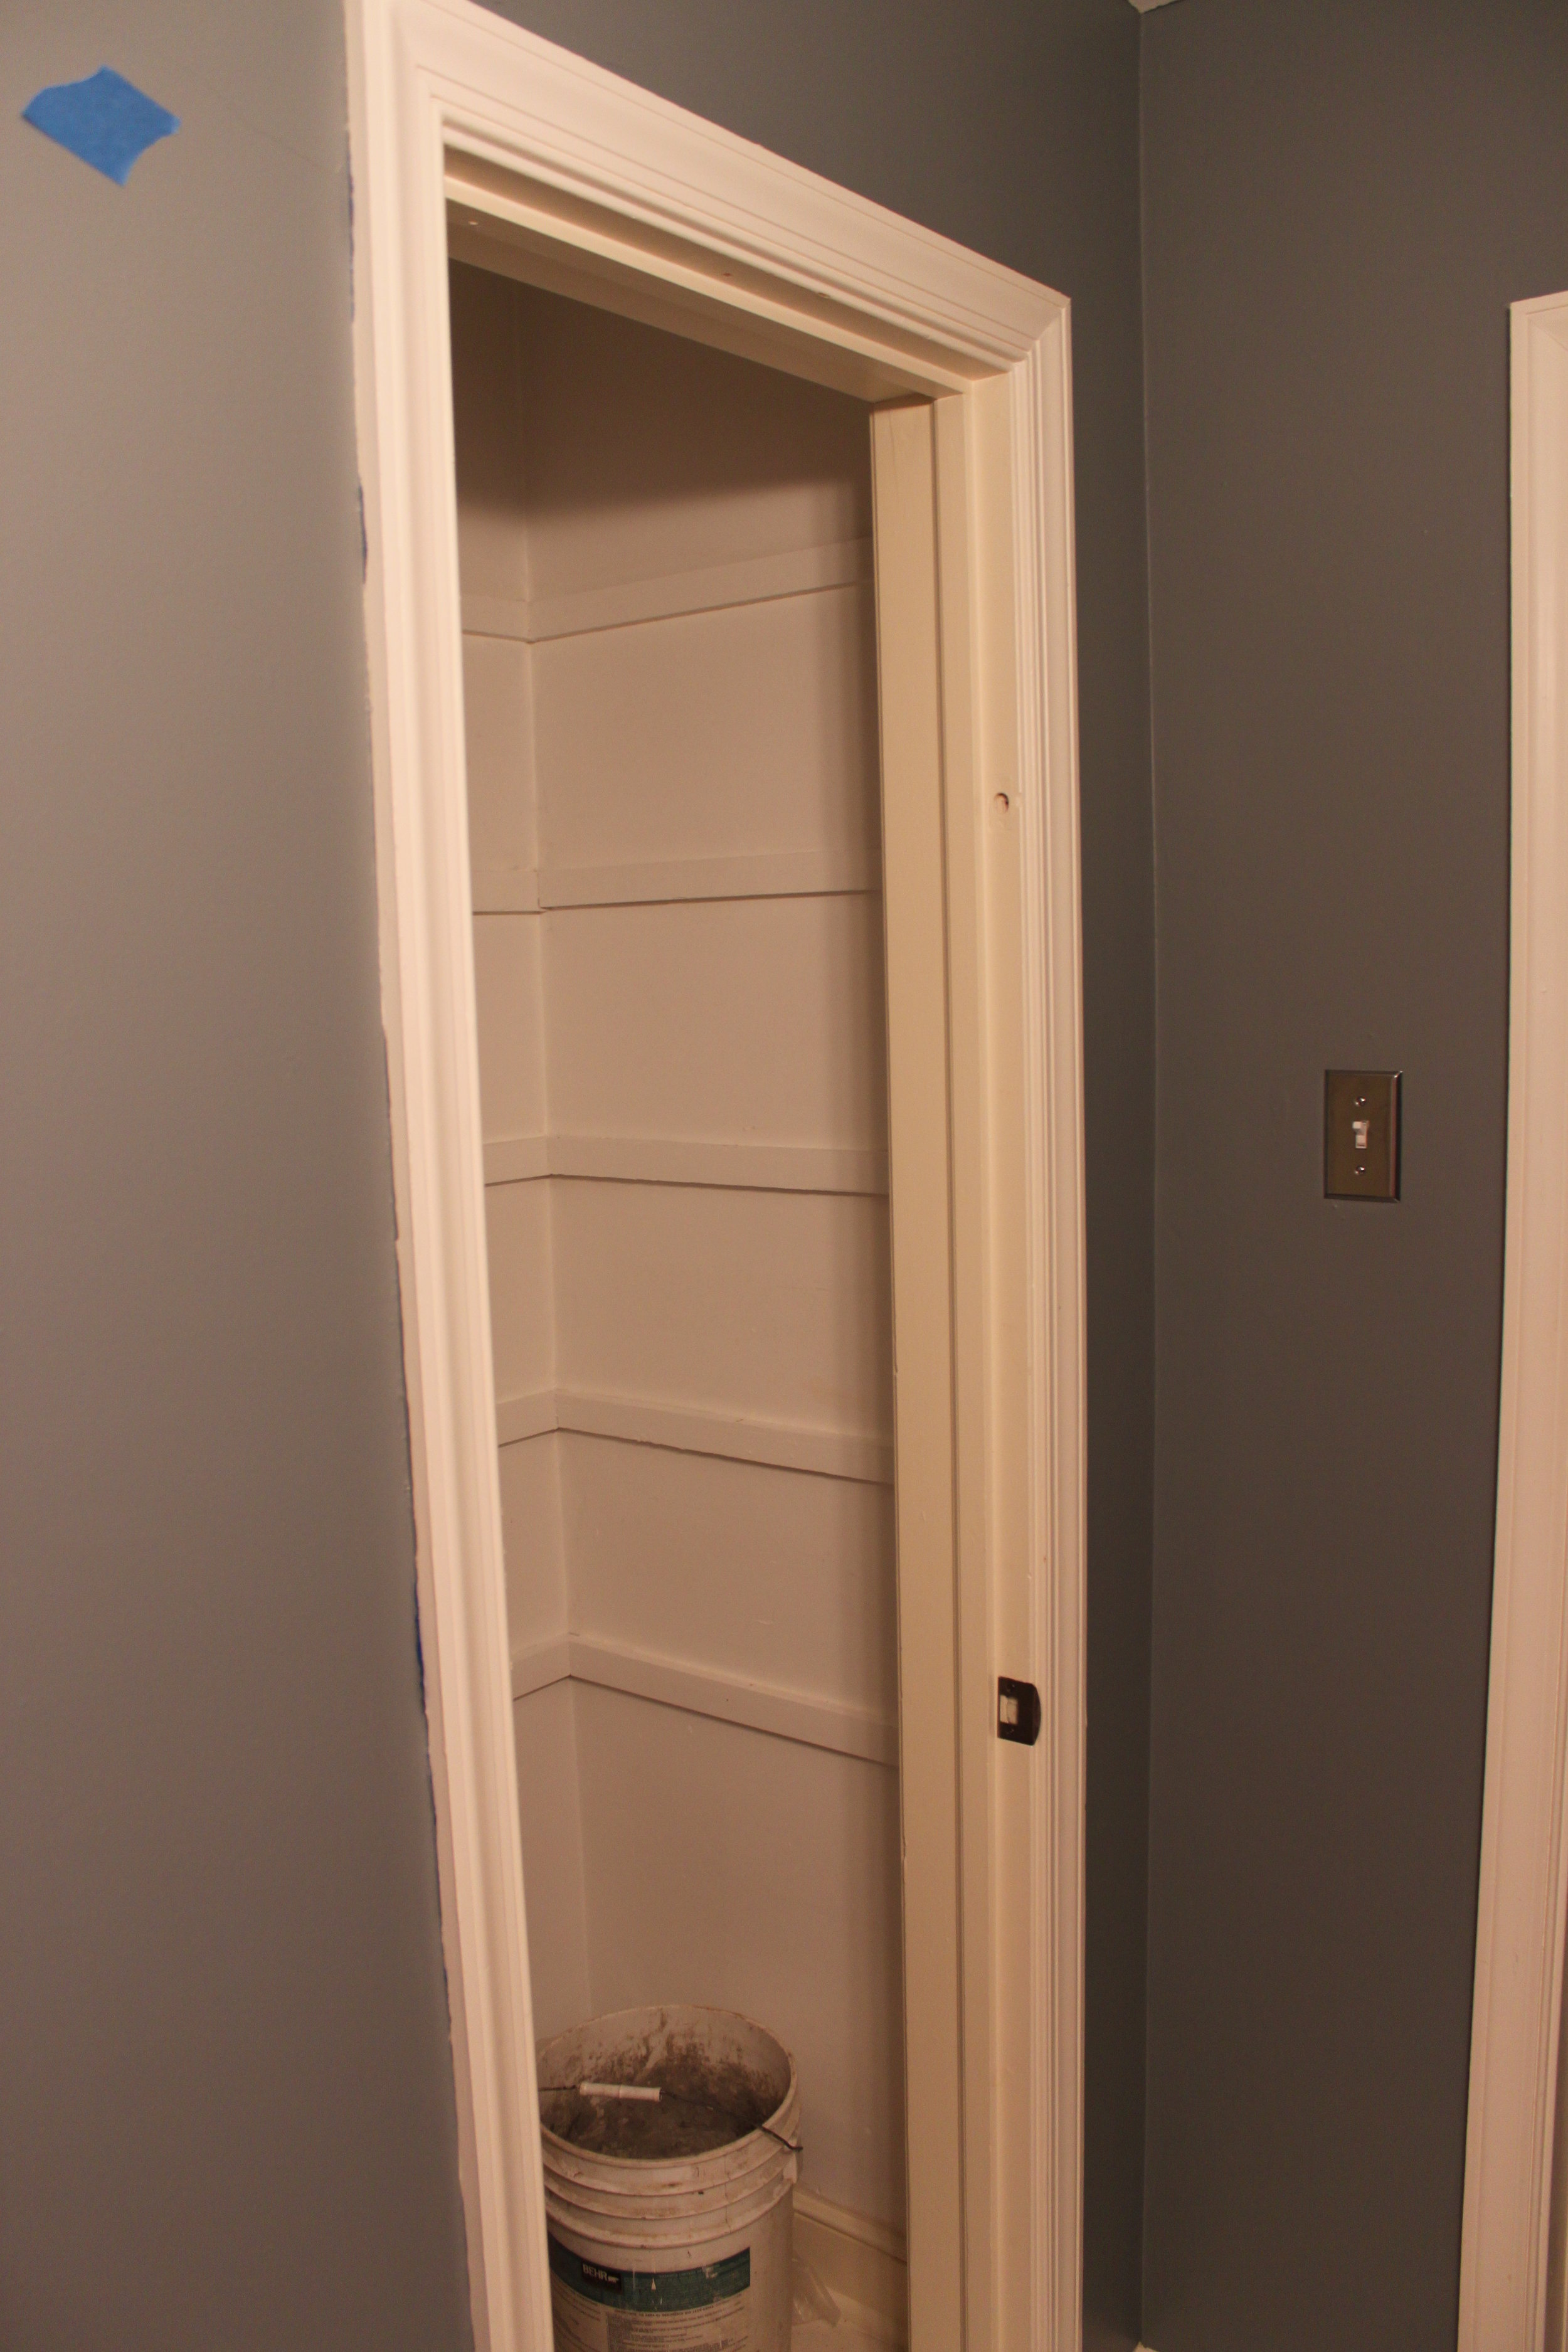
What once was a closet, will soon become a sink niche. I know what you are thinking..how could I get rid of storage space! Well, the bathroom is tight and this was much needed square footage for a better flow. Besides, not having this closet helps from hoarding too many towels! My dear friend Matt Paxton over at Clutter Cleaner would be proud. (www.cluttercleaner.com)
Check this plumbing out! On the right is the bracing and plumbing required for the old 1959 wall hung toilet.

The Godfather may give the advice to go to the mattresses. But in this bathroom we went to the studs! Floors, walls, ceilings. Everything that had plaster on it...gone. We did keep the existing porcelain tub. Although it's a bit small for today's standards, it's a classic. They just don't make 'em like they used to.

The building back begins. Since there was not enough room to make a water closet, we made a little privacy wall next to the toilet.

DRYWALL! NO more plaster walls!!!! Glorious!

And here is my new sink niche. This is surrounded by concrete backer board since it will be tiled.

Tile is being installed! I chose a large 18x18 plain white porcelain tile. I wanted something to be simple yet make a statement. I installed it "on the 45" for some interest. I used a 6x12 tile for the border. (actually 12x12's cut in half)

The tile is in and so is the vanity! I added a lime green glass tile for an accent. I picked lime green because it is bright and fun for this cheerful kids bathroom and can go with yellow, pink, and blue. So future color schemes are not limited! It's important to think about the future.
There is also a duplex outlet on either side of the vanity. This allows for lots of flexibility for the future. Whether it's a spiderman night light or a curling iron the bathroom is ready for it!

My privacy is finished out with a granite top that matches the vanity. It's all coming together. I also installed an outlet here. Currently the plan is to have a changing table here and the wipes warmer needs to be plugged in, but in the future this can plug in a nightlight!

We have lighting! Sconces on either side of the mirror are the most flattering lighting for this setting. So if you have the space, do sconces! I also installed a general flush mount fixture for overall lighting and a recessed can in the shower - make sure they are all rated for bathroom use!

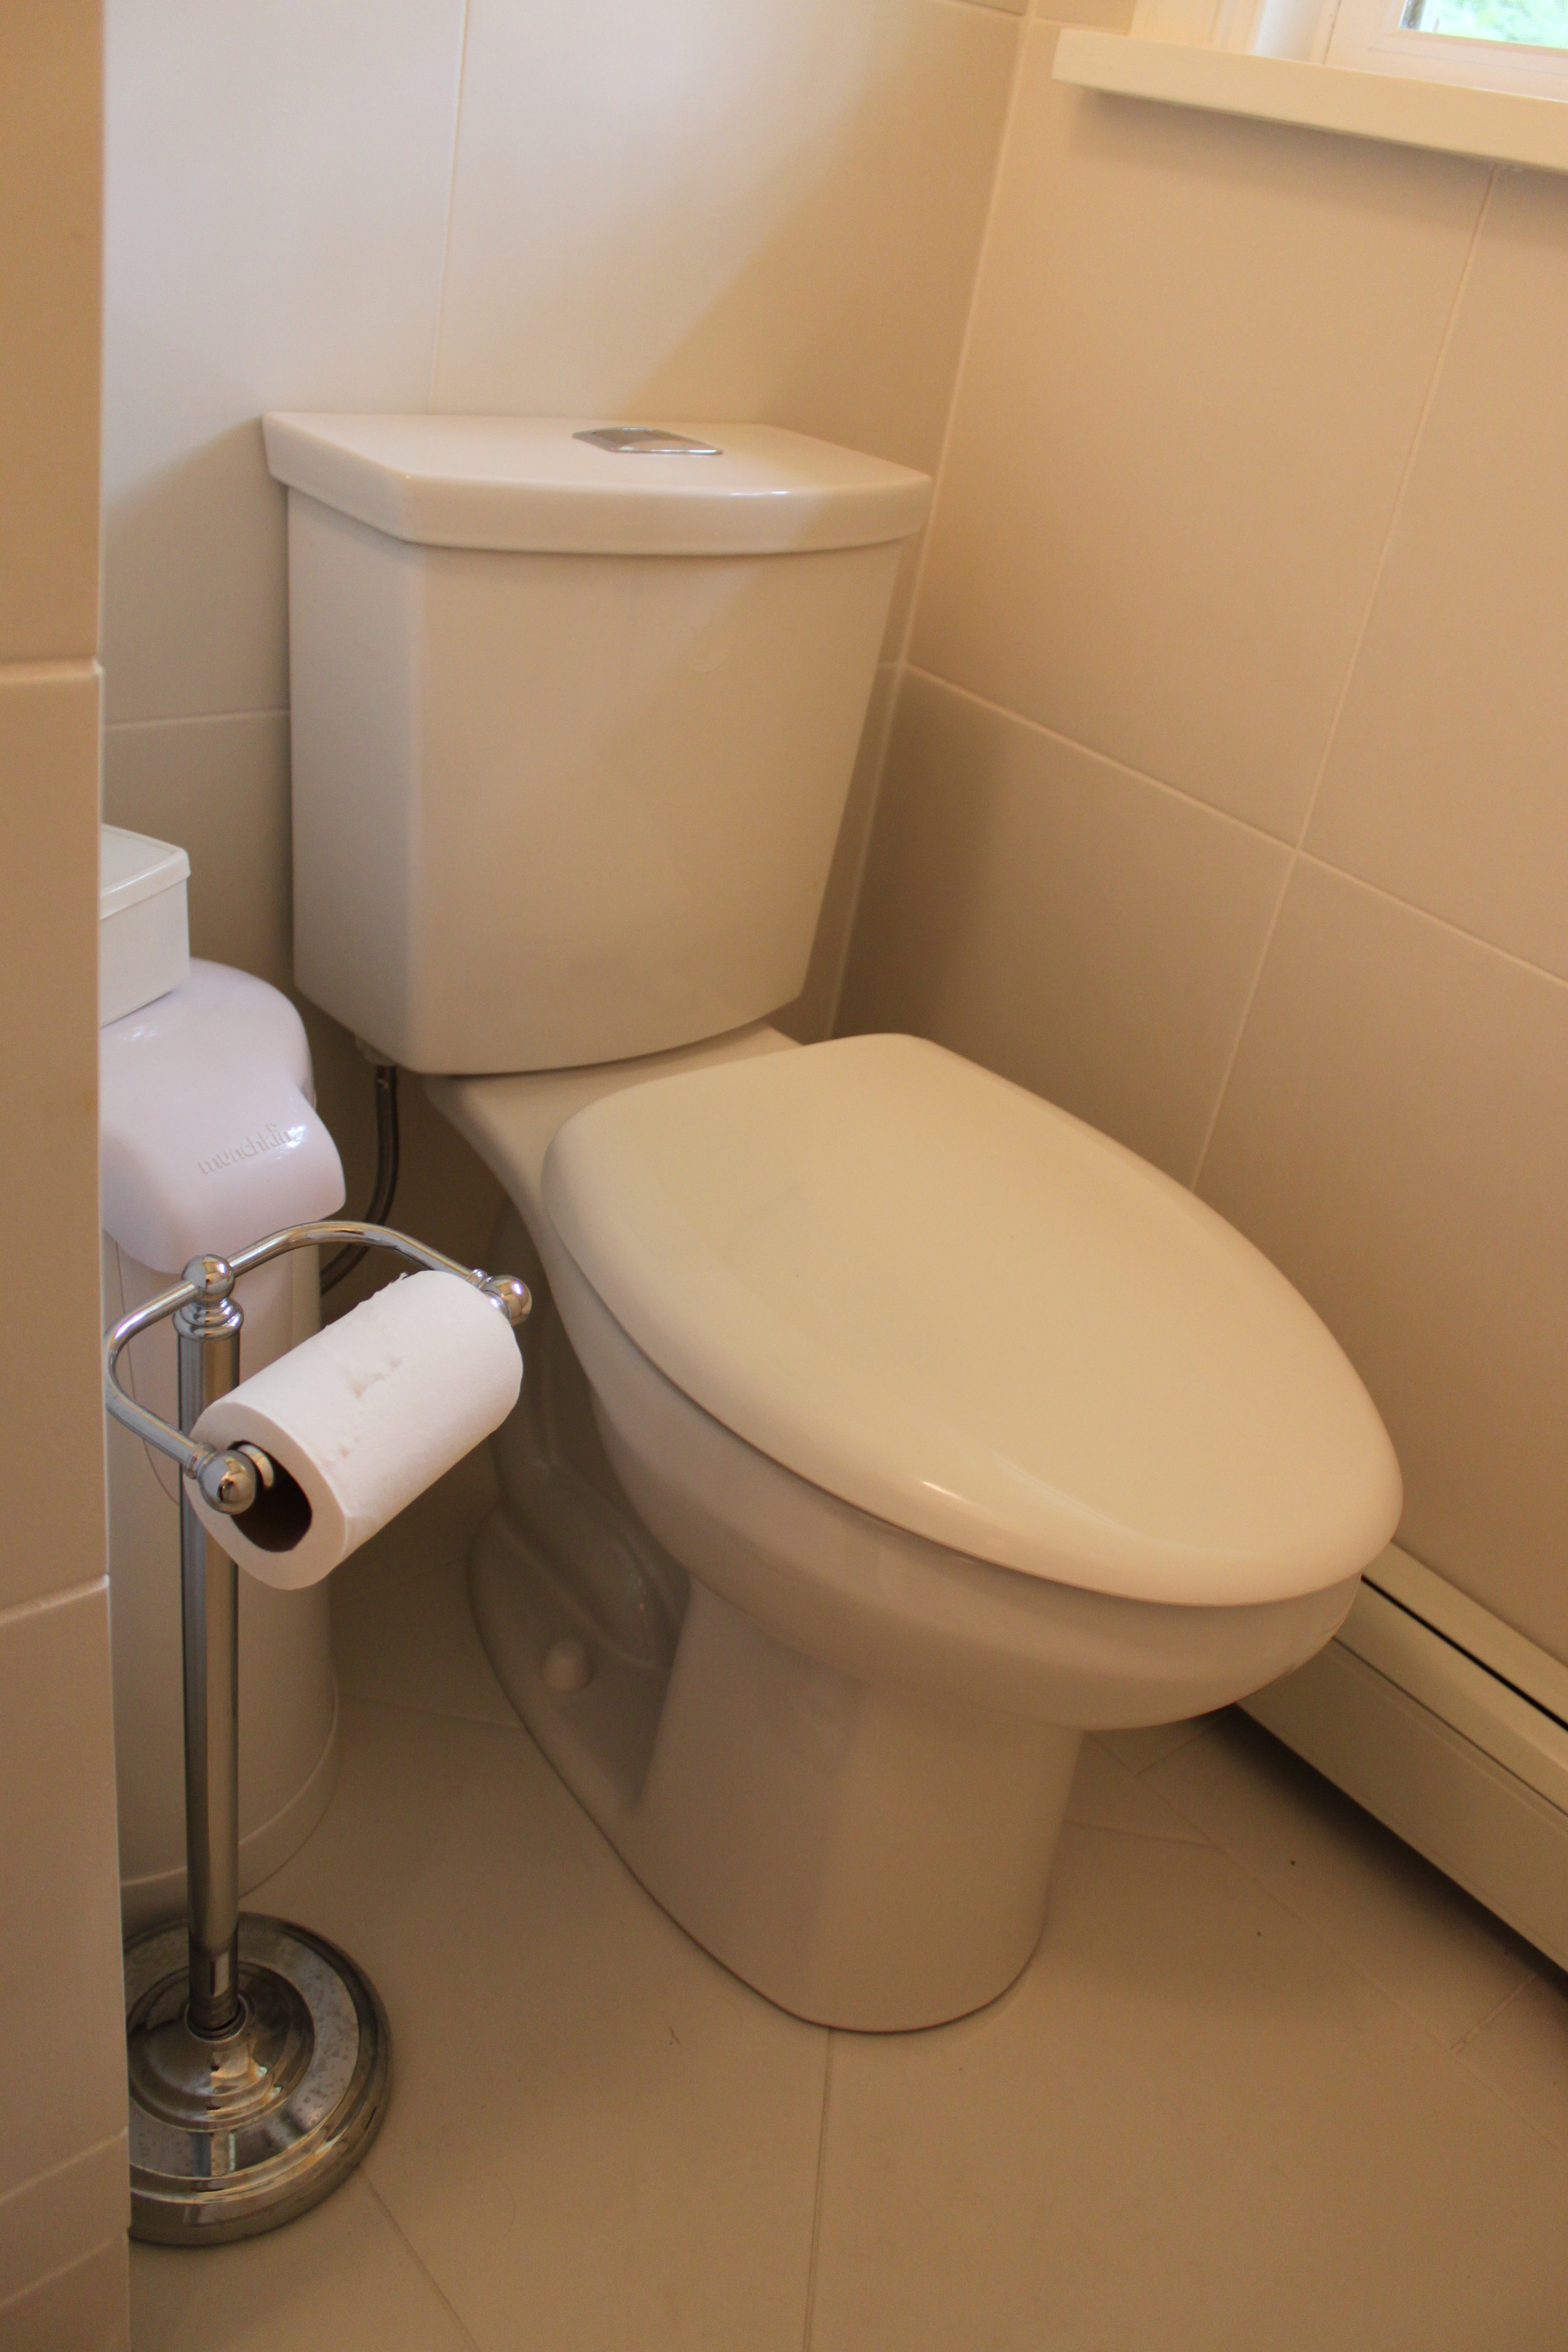
My fancy toilet. It's the little things in life. And during this project it was all about this toilet. What's so special about a toilet? Well, this one is comfort height (formerly known as ADA height). Kids will only be small for a short time. So one day they will want comfort height, too! And it also is elongated bowl. the lid is slow-closing so no slamming down and no little fingers being smashed. Maybe this will encourage putting the lid down? And it is dual flush. Think ahead - be green! The entire surrounding is tile. One day there may be a little boy in this bathroom...they're messy. Enough said.
In the shower I kept the flow of the accented green tile. Although I brought it up higher since the tile goes all the way to the ceiling. I also put in a "shampoo box". I had a fancy soap dish that I won at a luncheon, so I just needed a place for the bottles to go. The tub corners are never big enough and shelving can be an eyesore.


Here she is! The new vanity. Slow closing drawers and a decorative shelf on the bottom. Since I did take out the linen closet, this allowed me storage for the towels.
So there you have it. This bathroom once had pink tile and a tree through the ceiling. And now it's practical and functional...and looks good too!